If you’ve ever stood over the stove, browning meat and steaming veggies for your pup while juggling three other things — you’re not alone. That was me, every Sunday, trying to prep meals for Toby that were safe, simple, and full of love. But once I discovered the Instant Pot, everything changed.
Suddenly, what took an hour took 15 minutes. And better yet? Toby loved it. His bowl emptied faster. His coat grew shinier. His energy returned.
Whether you’re new to cooking for your dog or just looking for a shortcut that doesn’t cut corners, the Instant Pot is a game-changer. It locks in nutrients, reduces cooking stress, and helps you batch meals without sacrificing quality.
And if your dog is sensitive to ingredients like eggs, be sure to check out my full cooking guide here:
How to Cook Eggs for Dogs (And When to Avoid Them)
Now, let’s dive into the how — and the why — of making vet-approved homemade dog food in the Instant Pot.
Why Use an Instant Pot for Dog Food?
I’ll be honest — I bought my Instant Pot for soups and stews. I never expected it to become one of the most reliable tools in caring for Toby’s health. But once I started using it for his meals, I never looked back.
Here’s why it works so well for homemade dog food:
1. Nutrient Retention
The Instant Pot uses pressure and steam, which means ingredients cook quickly and retain more of their vitamins and minerals. That matters — especially when you’re cooking from scratch and relying on whole foods to fuel your dog’s body.
2. Convenience and Time-Saving
Life gets busy. But the Instant Pot lets you make a full batch of food in about 20 minutes — often less. No multiple pots. No hours on the stove. Just throw it in, set the timer, and go.
3. Consistency and Texture
Toby has a sensitive stomach, and textures matter. The Instant Pot gives me control over how soft or firm things turn out. Whether I’m cooking sweet potatoes, turkey, or rice, the results are even and easy to portion.
4. Batch Cooking Friendly
One session can cover several days — sometimes the entire week. I portion the meals, freeze what I need, and spend the rest of the week knowing Toby’s food is ready and nourishing.
This isn’t about gadgets. It’s about finding tools that make loving your dog easier, more sustainable, and less overwhelming. Because the more practical the process, the more likely we are to keep showing up for our dogs in the way they deserve.
Vet-Approved Ingredient List
When I first started cooking for Toby, I worried constantly — Am I giving him everything he needs? Is this safe? Is something missing? The truth is, homemade meals can be wonderfully nourishing, but only if they’re built on solid, vet-approved foundations.
This list includes ingredients that are not only safe, but beneficial — gently supporting digestion, coat health, energy, and long-term wellness.
Protein (choose one per batch)
- Lean ground turkey
- Ground chicken (no skin)
- Ground beef (90% lean or higher)
- Boneless skinless chicken thighs or breasts
- Salmon or white fish (occasional use)
Carbohydrates
- Brown rice
- White rice (better for sensitive stomachs)
- Quinoa (in small amounts)
- Rolled oats (for added fiber)
Vegetables
- Carrots (chopped or shredded)
- Green beans
- Zucchini
- Spinach or kale (in moderation)
- Pumpkin (plain, canned, or steamed)
Healthy Fats
- Olive oil or safflower oil (1–2 tablespoons per batch)
- Ground flaxseed (optional for omega-3 boost)
Optional Add-ins
- Hard-boiled egg (chopped)
- Blueberries (a few, for antioxidants)
- Chopped parsley (for digestion and breath)
- Eggshell powder (as a calcium source — vet-guided)
The most important rule? No garlic, onions, salt, or artificial ingredients. Ever. Dogs metabolize differently than we do, and what’s harmless for us can be toxic for them.
If you’re just getting started and unsure how to cook eggs for your pup safely, I wrote a complete guide here:
How to Cook Eggs for Dogs (And When to Avoid Them)
3 Quick Instant Pot Recipes for Dogs
These are the exact meals I cooked for Toby when I needed something reliable, balanced, and fast. They’re simple, scalable, and built around whole ingredients your vet would likely approve of.
Each one takes less than 30 minutes from start to finish — and fills the house with that comforting “someone’s cooking” smell. For me, it’s not just about feeding Toby. It’s about showing up with love — one bowl at a time.
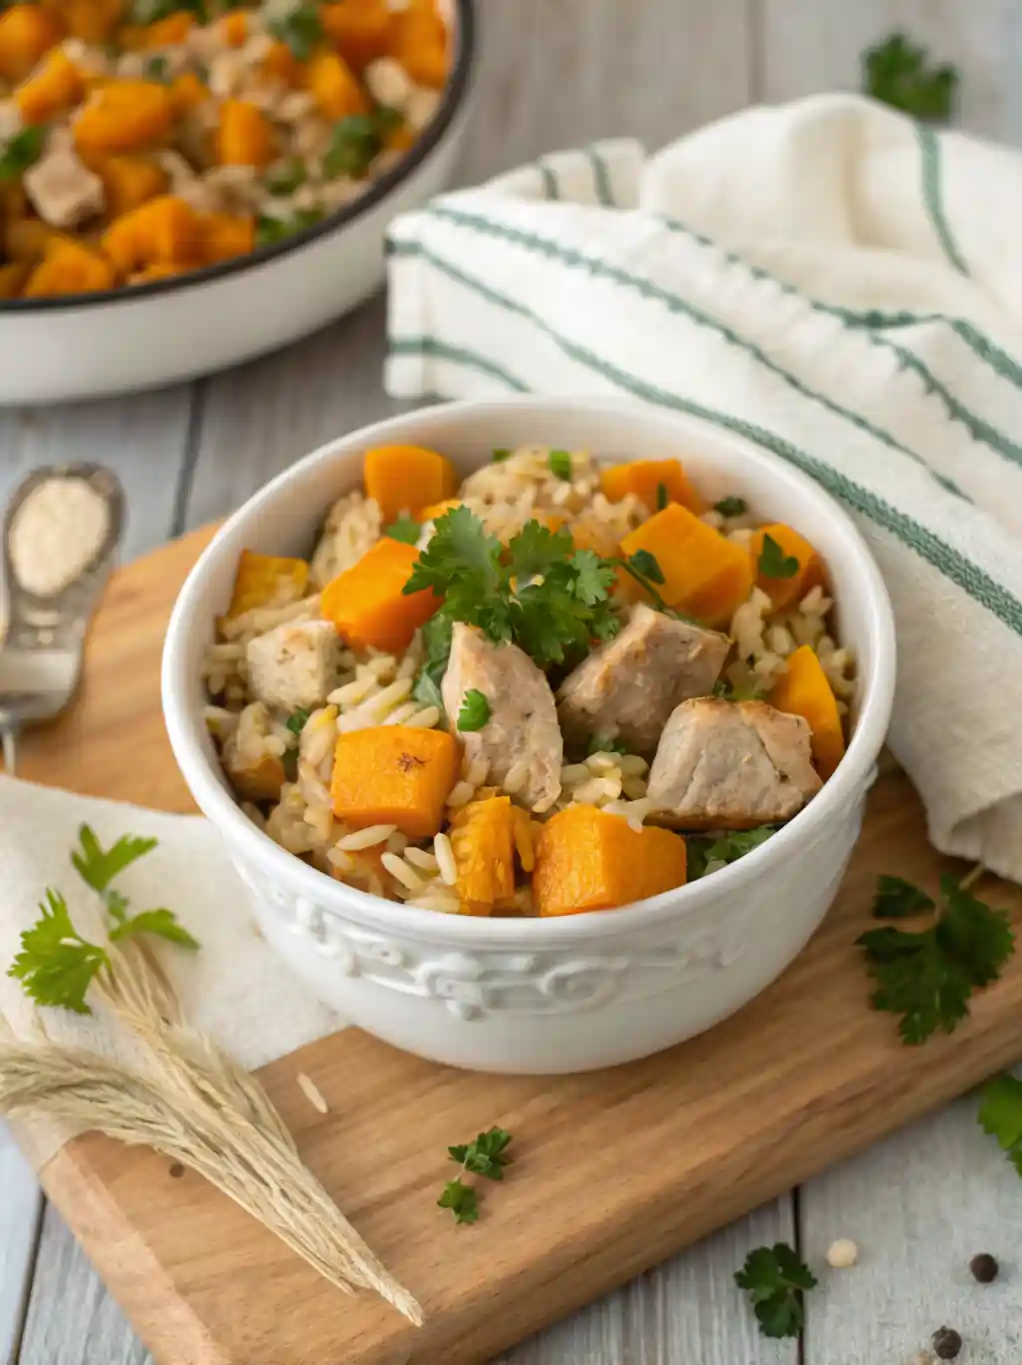
1. Turkey & Pumpkin Comfort Bowl

Ingredients:
- 1 lb ground turkey
- 1 cup white rice
- 1/2 cup chopped carrots
- 1/2 cup pumpkin (plain)
- 2 cups water
- 1 tablespoon olive oil
Instructions:
Sauté turkey in the Instant Pot using the “Sauté” setting until lightly browned. Add all other ingredients. Seal and cook on high pressure for 12 minutes. Natural release. Stir and cool before serving.
2. Chicken & Sweet Potato Digestive Blend
Ingredients:
- 2 boneless, skinless chicken breasts (cubed)
- 1 cup sweet potato (cubed)
- 1/2 cup green beans
- 1/2 cup rolled oats
- 2 cups water or low-sodium chicken broth
Instructions:
Add all ingredients to the Instant Pot. Set to high pressure for 15 minutes. Let pressure release naturally. Stir, mash slightly if needed, and cool.
3. Beef & Rice Energy Bowl
Ingredients:
- 1 lb lean ground beef
- 1 cup brown rice
- 1/2 cup chopped zucchini
- 1/4 cup chopped spinach
- 2.5 cups water
- 1 teaspoon ground flaxseed (optional)
Instructions:
Use “Sauté” mode to brown beef. Drain fat if needed. Add remaining ingredients. Cook on high pressure for 14 minutes. Natural release. Mix and cool.
Ground Turkey, Chicken & Rice Variations
If there’s one thing I learned quickly as a home cook for Toby, it’s that flexibility is survival. Not every week looks the same. Sometimes you run out of sweet potato, sometimes turkey’s on sale, and sometimes… your dog just changes their mind.
That’s why I love working with ground meats and rice as a base. They’re easy to digest, widely available, and endlessly adaptable.
Here are some of my favorite mix-and-match variations:
Turkey-Based Meals
Try these combos:
- Ground turkey + pumpkin + spinach + rice
- Ground turkey + carrots + zucchini + oatmeal
- Ground turkey + quinoa + parsley (for breath)
Great for: Dogs with sensitive stomachs, mild allergies, or low-fat diet needs.
Chicken-Based Meals
Try these combos:
- Chicken thighs + sweet potato + green beans
- Chicken breast + peas + rice + egg
- Chicken + blueberries + brown rice (a touch of fruit is okay)
Great for: Dogs needing lean protein with added fiber or hydration.
Beef-Based Meals
Try these combos:
- Lean beef + brown rice + shredded carrots
- Ground beef + rolled oats + spinach
- Beef + mashed potato + egg yolk
Great for: Dogs who need more calories or have higher activity levels.
Tips for Customizing Safely
- Introduce new ingredients one at a time.
- Use meat-to-carb ratio around 40/30/30 (protein/carbs/veg).
- Always cool meals fully before serving.
- Freeze extra portions in silicone molds or airtight containers.
And if eggs are part of your rotation — whether scrambled or boiled — be sure to check out this safe prep guide:
How to Cook Eggs for Dogs (And When to Avoid Them)
Because every dog is different. But every bowl can be built with the same things: awareness, love, and good food.
Safe Storage & Portioning Tips
Once you’ve cooked a big, nourishing batch of homemade food, the next question is always: how do I store this? When Toby’s meals became a regular part of my kitchen routine, I learned that safe storage is just as important as safe ingredients.
Here’s what works — and what keeps both your dog and your fridge happy.
Refrigeration
- Store cooled food in airtight containers.
- Keeps safely in the fridge for up to 3–4 days.
- Use shallow containers to cool food faster and prevent bacterial growth.
- Label each container with the date cooked and contents.
I prep 3 days’ worth at a time and keep the rest frozen — it takes out the guesswork.
Freezing
- Use silicone molds or freezer-safe bags for portioning.
- Lay bags flat to save space.
- Freeze in single-meal portions so you don’t have to thaw too much at once.
- Keeps in the freezer for up to 2 months.
To serve, thaw overnight in the fridge or warm gently in a pan with a bit of water or broth. Avoid microwaving from frozen — it can create hot spots and ruin texture.
Portioning by Weight
Every dog’s needs are different, but here’s a basic rule of thumb:
- 2–3% of your dog’s ideal body weight per day
(e.g., a 50 lb dog = ~1–1.5 lbs of food per day)
Divide that into 2 meals, or 3 for puppies and seniors.
It’s not about being perfect. It’s about creating consistency, reducing stress, and keeping your pup’s meals safe and simple.
FAQ: Can I Use a Pressure Cooker Instead?
Q: Can I use a regular pressure cooker instead of an Instant Pot?
A: Yes — most recipes designed for the Instant Pot can be made in a traditional pressure cooker. The core idea is the same: cook quickly, seal in nutrients, and simplify the process. Just keep a close eye on timing and liquid ratios, as traditional pressure cookers often require a bit more water and manual release.
Q: How long can I freeze homemade dog food?
A: Up to 2 months in airtight containers. Be sure to label your portions and use within that window for best taste and nutritional quality.
Q: Do I need to add supplements to these recipes?
A: Possibly. While these meals are nutrient-rich, long-term homemade feeding should include a vet-approved multivitamin or mineral blend to ensure complete balance — especially calcium, zinc, and vitamin D.
Q: Can I add eggs to Instant Pot meals?
A: Absolutely — either scramble separately and stir in after cooking, or hard-boil them in the pot beforehand. For guidance, I’ve written a full post here:
How to Cook Eggs for Dogs (And When to Avoid Them)
The Instant Pot changed more than just my cooking routine — it changed how I care for Toby. It gave me time back. Confidence back. It turned dinner into something I could feel good about, even on my busiest days.
If you’re here, you’re probably feeling what I once felt — that tug of love that says, “I want to do better for my dog.” You already are.
Homemade meals don’t have to be complicated. They just have to be honest, safe, and made with love.
You’re not alone. Welcome to the pack.
Instant Pot Turkey & Pumpkin Comfort Bowl for Dogs
Ingredients
Equipment
Method
- Set the Instant Pot to “Sauté” mode and brown the ground turkey until no longer pink.
- Add rice, carrots, pumpkin, olive oil, and water. Stir to combine.
- Seal the Instant Pot and cook on high pressure for 12 minutes. Let pressure release naturally.
- Once cooled, stir well and portion into containers. Serve lukewarm or store.